Table of Contents
ToggleA clogged dishwasher filter is one of the most common, and easily fixed, reasons behind cloudy glasses, filmy residue on plates, and lingering food odors. Most Whirlpool dishwasher models use a manual-clean filter system that traps food particles before they recirculate onto dishes. Unlike older models with self-cleaning grinders, these filters require routine maintenance to keep water flowing freely and dishes coming out spotless. The good news? Cleaning a Whirlpool dishwasher filter takes less than ten minutes and requires nothing more than warm water, a soft brush, and a little elbow grease. Here’s how to locate, remove, clean, and reinstall the filter the right way, plus guidance on how often to tackle the job.
Key Takeaways
- Cleaning a Whirlpool dishwasher filter prevents cloudy glasses, filmy residue, and odors while taking less than ten minutes with just warm water and a soft brush.
- The typical Whirlpool dishwasher filter uses a two-part system—a fine mesh cylinder and a lower coarse screen—both located at the bottom of the tub and easily removable without tools.
- Remove the upper filter by twisting counterclockwise a quarter turn, rinse both components under warm water from the inside out, and scrub gently with a soft-bristle brush to avoid damaging the mesh.
- Clean your Whirlpool dishwasher filter monthly for most households, or every two weeks if you use heavy loads or have hard water; watch for warning signs like slow drainage and musty odors.
- Always reinstall the filter with the lower screen flat in the sump cavity, then seat and lock the upper filter clockwise until you hear a click to ensure proper water circulation and full filtration.
Why Cleaning Your Whirlpool Dishwasher Filter Matters
The filter in a Whirlpool dishwasher sits at the bottom of the tub and captures food debris, grease, and mineral buildup before they can coat dishes or damage the drain pump. When it’s clean, water circulates efficiently and spray arms deliver strong, even coverage. When it’s neglected, you’ll start noticing warning signs: dishes that come out gritty, a foul smell when you open the door, or water pooling at the bottom after a cycle.
A blocked filter doesn’t just hurt cleaning performance, it can also strain the pump and shorten the appliance’s lifespan. In severe cases, a fully clogged filter can cause drainage failures that require more intensive troubleshooting. Regular filter cleaning prevents these issues and keeps your dishwasher running at peak efficiency. Think of it as the dishwasher equivalent of changing the oil in your car: simple preventive maintenance that saves you headaches down the road.
Most Whirlpool models, including the popular Whirlpool Gold series dishwasher filter assemblies, use a two-part system: a fine mesh cylinder and a coarser lower screen. Both components need attention, and both are designed to be user-serviceable without tools.
Locating Your Whirlpool Dishwasher Filter
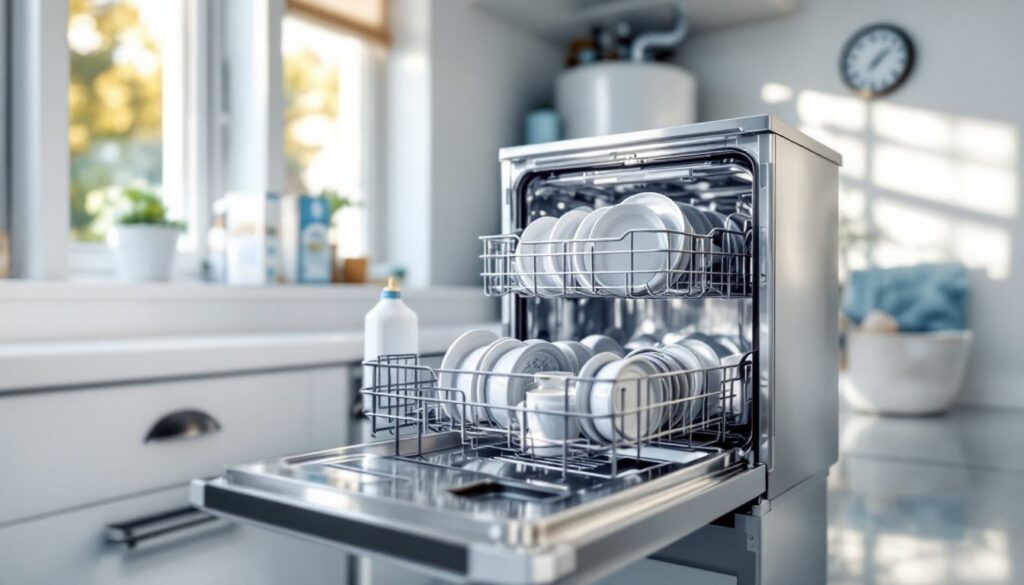
The whirlpool dishwasher filter location is consistent across most models, but knowing what you’re looking for speeds up the job. Open the dishwasher door and pull out the bottom rack completely, you’ll need full access to the floor of the tub. Look toward the back corner (usually the left rear) at the base of the lower spray arm. You’ll see a circular assembly with a cylindrical filter tube rising from the tub floor, typically about 4–6 inches tall.
This is the upper filter assembly. It’s a fine mesh cylinder, often white or gray, with a handle or grip at the top. Beneath it sits a flat, coarse screen, the lower filter, that covers the sump area. On some Whirlpool Gold models and older units, the filter is centered rather than corner-mounted, but the two-part design remains the same.
If you’re working with an older Whirlpool dishwasher, the filter may have a slightly different shape or locking mechanism, but the location stays consistent: bottom of the tub, under or near the spray arm. If you don’t see an obvious cylindrical filter, check your owner’s manual, a very small number of legacy models use a self-cleaning grinder and don’t have a removable filter at all. Those are rare, though. Most units built in the last 15 years have the manual-clean setup.
How to Remove the Filter from Your Whirlpool Dishwasher
Whirlpool dishwasher filter removal is straightforward, but the locking mechanism varies slightly by model. The most common design uses a quarter-turn twist lock. Grasp the top of the cylindrical upper filter and turn it counterclockwise (left) about a quarter turn, usually 90 degrees. You’ll feel it disengage. Lift straight up to pull the filter assembly free.
Some models use a lift-and-pull design with no twist: simply grasp the handle and pull upward with steady pressure. If it resists, don’t force it. Check for a small arrow or “unlock” indicator on the filter body, that shows the direction to turn. If you’re still stuck, run a short rinse cycle to flush out any debris that might be wedging the filter in place, then try again.
Once the upper filter is out, you’ll see the lower filter screen sitting flat on the tub floor. This piece usually lifts straight out without any locking mechanism. Slide your fingers under the edge and pull up gently. On some units, the lower screen is held in place by the upper assembly and comes out as a single unit.
Set both filter pieces on a towel near the sink. Before you move to cleaning, take a quick look inside the now-exposed sump area. If you see standing water, large food chunks, or visible buildup, remove them by hand (wear gloves if you prefer). This step prevents debris from recirculating when you reinstall the filter.
Step-by-Step Cleaning Process for Maximum Results
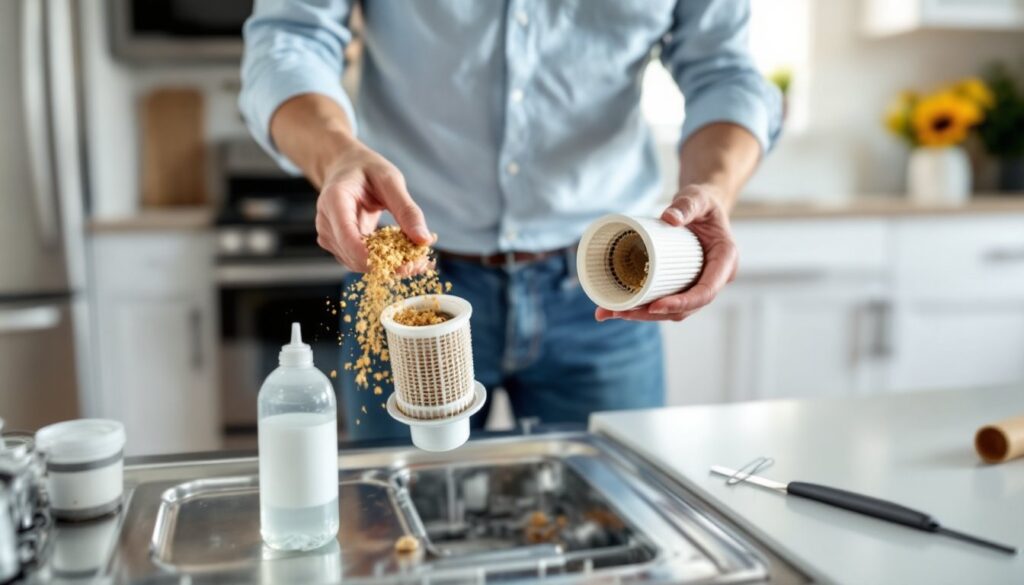
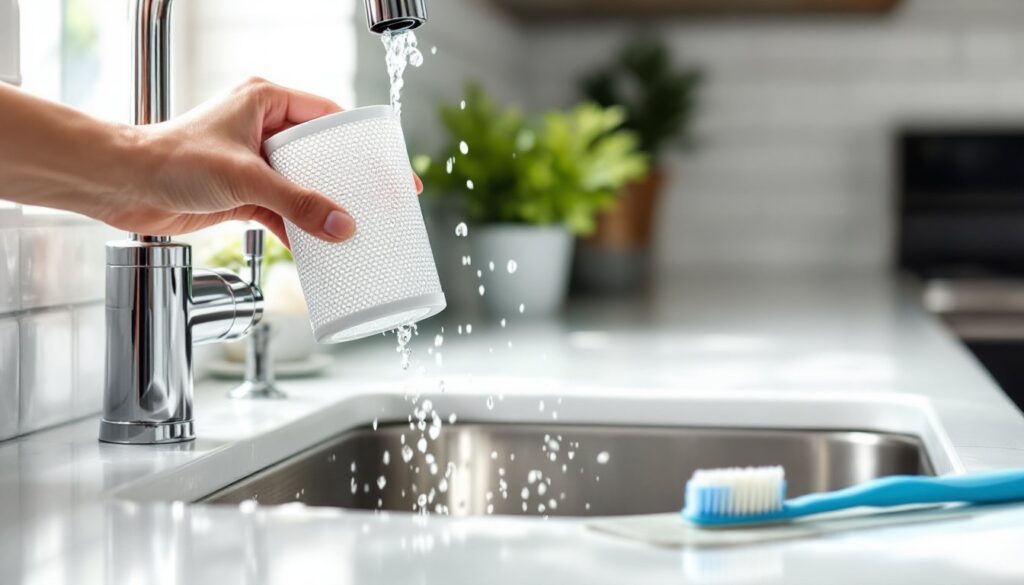
Now comes the actual cleaning. Start by rinsing both filter components under warm running water at the kitchen sink. Hold the cylindrical upper filter under the faucet and let the water flow from the inside out, this flushes trapped particles through the mesh in the direction opposite to normal operation, which is more effective than rinsing from the outside in.
For stubborn buildup, you’ll need a soft-bristle brush. An old toothbrush works well, as does a dish brush with nylon bristles. Avoid wire brushes or abrasive pads, they can damage the fine mesh and reduce filtration efficiency. Gently scrub the inside and outside of the cylindrical filter, paying special attention to the mesh perforations. If you see white, chalky residue (mineral deposits from hard water), soak the filter in a 50/50 mix of white vinegar and warm water for 10–15 minutes, then scrub again.
Clean the flat lower screen the same way: rinse under warm water, then scrub both sides with the brush. Food debris often collects around the perimeter and in the corners. If grease has built up, add a drop of dish soap to your brush and work it into a lather before rinsing thoroughly. Soap residue left on the filter can create suds during the next wash cycle, so rinse until the water runs completely clear.
For heavily soiled or neglected filters, common in older Whirlpool dishwashers that haven’t been maintained regularly, consider a deeper soak. Submerge both filter pieces in a basin of hot water mixed with a cup of white vinegar or a dishwasher-safe degreaser. Let them sit for 20–30 minutes, then scrub and rinse. This approach works especially well on filters with baked-on grease or years of mineral scale.
Rinsing and Scrubbing Techniques
Proper rinsing is just as important as scrubbing. Hold each filter component up to the light after cleaning, if you can’t see through the mesh clearly, it’s not clean enough. Trapped debris in the perforations will restrict water flow and defeat the purpose of cleaning. Rinse from multiple angles, rotating the filter as you work, and use your fingers to gently flex the mesh and dislodge any remaining particles.
For the lower screen, flip it over and rinse both sides under high water pressure. If your sink has a spray nozzle, use it. The goal is to remove every bit of visible debris so the filter can do its job when reinstalled. Once both pieces are visibly clean and free of buildup, set them on a clean towel to air dry for a few minutes. They don’t need to be bone-dry before reinstalling, but shaking off excess water makes handling easier.
Reinstalling the Filter Correctly
Reinstalling the filter is the reverse of removal, but proper seating is critical. If the filter isn’t locked in place, water can bypass it entirely, and you’ll lose all filtration. Start by placing the lower filter screen back into the sump cavity at the bottom of the tub. It should sit flat and flush with the floor. Make sure it’s oriented correctly, some screens have a notch or tab that aligns with a corresponding slot in the tub.
Next, insert the upper cylindrical filter into the center opening. Lower it straight down until it seats fully, then rotate it clockwise (right) a quarter turn to lock it in place. You should feel or hear a slight click when it engages. Give the filter a gentle tug upward, if it’s locked correctly, it won’t budge. If it lifts out easily, it’s not seated. Remove it and try again, making sure the locking tabs are aligned before twisting.
On some models, the upper filter has alignment arrows or raised indicators on the rim. Match these to the markings on the tub floor before twisting. If you’re working with a Whirlpool Gold dishwasher filter or an older unit with a slightly different mechanism, the principle is the same: seat fully, twist to lock, confirm it’s secure.
Once the filter is reinstalled, slide the bottom rack back into place and run a short rinse cycle with the dishwasher empty. This flushes out any remaining debris in the sump and confirms that water is draining properly. If you notice slow drainage or standing water after the cycle, the filter may not be seated correctly. Remove it and reinstall, checking for a secure lock.
How Often Should You Clean Your Whirlpool Dishwasher Filter?
General guidance for whirlpool dishwasher filter cleaning frequency is once a month for most households. If you run heavy loads with lots of baked-on food, have hard water, or don’t pre-rinse dishes, you may need to clean it every two weeks. Light users, say, a couple who runs the dishwasher three times a week with minimal food residue, can stretch it to six weeks.
Watch for performance cues. If dishes start coming out dirty, water pools at the bottom after a cycle, or you smell a musty odor when opening the door, it’s time to clean the filter regardless of the calendar. These are reliable indicators that the filter is clogged and water isn’t circulating properly. Drainage issues, in particular, are often linked to filter blockages and debris buildup in the sump area.
If you’re dealing with an older Whirlpool dishwasher that’s been in service for years, establishing a regular cleaning routine now can reverse performance decline and extend the appliance’s lifespan. Many homeowners don’t realize their dishwasher even has a cleanable filter until they start noticing problems, by then, the buildup can be significant.
Set a recurring reminder on your phone or tie the task to another monthly chore (first of the month, same day you change HVAC filters, etc.). Consistency is key. A clean filter means better cleaning results, fewer repairs, and a dishwasher that lasts longer. Home maintenance experts at Good Housekeeping and The Spruce recommend filter cleaning as one of the simplest, highest-impact appliance tasks most people skip.
For Whirlpool Gold series owners and those with older models, note that replacement filters are available if the mesh becomes torn or permanently stained. Check the model number inside the door frame and search for OEM or compatible aftermarket parts. Replacing a damaged filter is inexpensive and restores full filtration performance.