Table of Contents
ToggleA dishwasher that doesn’t get water is one of the most frustrating kitchen appliance failures, and often the easiest to fix yourself before calling for a repair. When your dishwasher isn’t cleaning dishes because there’s no water reaching the tub, the culprit is usually something simple: a closed shutoff valve, a kinked supply line, a clogged inlet filter, or a tripped door latch. This guide walks you through five practical troubleshooting steps to identify and resolve the problem. Most of these fixes require nothing more than a wrench, a flashlight, and 15 minutes of your time.
Key Takeaways
- When your dishwasher does not get water, check the shutoff valve under the sink first—many cases are resolved simply by turning the valve fully open counterclockwise.
- Inspect the water supply line for kinks, crimps, or damage; a straightened line or replacement hose often restores water flow without professional help.
- The inlet filter at the valve connection point commonly clogs with mineral deposits—cleaning it with warm water and vinegar is a quick DIY fix that typically solves dishwasher water issues.
- A faulty door latch or control panel settings like child lock or delay start can prevent the dishwasher from filling even if water supply is normal.
- Call a professional repair service if the dishwasher does not get water after checking the valve, supply line, inlet filter, and door latch, or if you notice humming sounds, leaks, or burning smells.
- Regular dishwasher maintenance with vinegar prevents mineral buildup that can interfere with valve operation and water-fill problems.
Check the Water Supply Connection
Before diving into the dishwasher itself, confirm that water can actually reach it. The water supply line connects to a shutoff valve located under the kitchen sink, typically near the hot water line. Start by confirming the valve is fully open, turn it counterclockwise until it stops. Many homeowners discover their water won’t flow simply because someone (or a plumber during a service call) left the valve partially or fully closed.
Next, inspect the flexible water line itself. Look for sharp bends, kinks, or pinches that could restrict flow. Run your hand along the entire line from the shutoff valve to the dishwasher inlet. If you spot a crimp or obstruction, gently straighten it. Check both ends of the line for damage, splits, or corrosion. A damaged line should be replaced: most hardware stores carry replacement inlet hoses in standard lengths.
Finally, verify that your household water pressure is normal. Turn on the kitchen sink and run water at full pressure for a few seconds. If water flows weakly everywhere, you may have a broader supply issue unrelated to the dishwasher. Low pressure at the sink suggests a problem with your main water supply or shutoff valve, which requires attention from a professional plumber.
Inspect the Water Inlet Valve
The inlet valve is an electrically controlled valve that opens during the fill cycle to let water into the dishwasher tub. When it fails, the dishwasher won’t fill at all, or it may fill intermittently. A faulty inlet valve often produces a humming or buzzing sound at the start of the cycle, that’s the solenoid trying (and failing) to open the valve.
To inspect the valve, turn off the power to the dishwasher at the circuit breaker and shut off the water supply. Remove the lower front kickplate or access panel (usually held by two screws). Look for the inlet valve near the water line connection at the bottom of the unit. Check for visible leaks, corrosion, or burn marks around the solenoid coil. A burnt or discolored solenoid indicates electrical failure.
If you see mineral buildup or white deposits around the valve connections, the valve may be clogged. But, testing and replacing an inlet valve requires electrical multimeter work and mechanical skill, this is where most DIYers should call for professional service. The valve itself typically costs $150–$300 in parts and labor, depending on the model and your region.
Clean or Replace the Water Inlet Filter
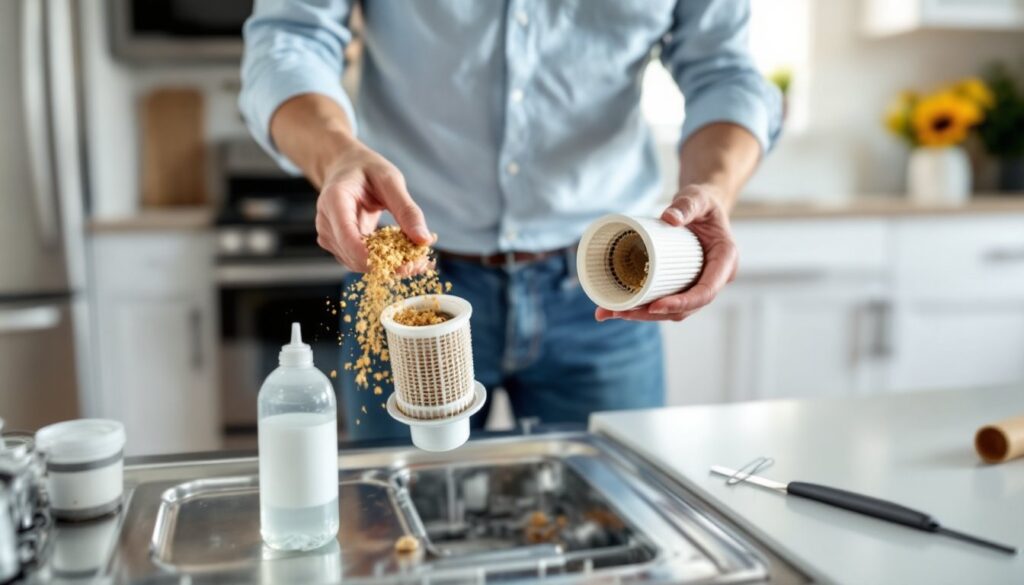
Many inlet valves include a small mesh filter screen at the water connection point that traps debris and mineral particles. Over time, this filter clogs with sediment, reducing water flow to nothing. The good news: cleaning this filter is often a straightforward DIY task.
Start by shutting off the water supply and power to the dishwasher. Locate the inlet valve (as described above) and trace the water line to where it connects. Carefully disconnect the water line from the valve using a wrench, have a small bowl or towel handy to catch residual water. Look inside the valve connection point: you should see a small cylindrical screen. Gently remove it using needle-nose pliers or a small flathead screwdriver.
Rinse the screen under warm water and gently brush away deposits using a soft toothbrush or cloth. For stubborn mineral buildup, soak the screen in white vinegar for 30 minutes, then brush again. Rinse thoroughly and reinstall. Reconnect the water line, turn water and power back on, and run a short test cycle. If the filter is severely damaged or if cleaning doesn’t restore flow, the valve assembly may need replacement, a task best left to a qualified repair technician. Resources like the inlet valve installation instructions can guide you if you’re comfortable with the work.
Examine the Door Latch and Control Panel
Here’s a sneaky culprit: the dishwasher won’t fill if it detects that the door is open. A faulty door latch or latch switch tricks the control board into thinking the door isn’t secure, which prevents the fill valve from energizing. Similarly, a malfunctioning control panel or electronic board may fail to send power to the inlet valve even though the door is properly closed.
Test the Door Latch for Proper Sealing
Close the dishwasher door and listen for a firm click. The latch striker (the metal part on the door) should engage with the latch catch (on the frame) with a satisfying snap. If the latch feels loose or doesn’t click, or if you can pull the door open easily without unlatching it, the latch needs adjustment or replacement.
Inspect the door gasket (rubber seal) for warping, splits, or food debris. A warped gasket can prevent the door from closing fully, which keeps the latch from engaging. Clean debris from the gasket and frame using a damp cloth. Check for obstructions, sometimes a utensil or rack arm prevents full closure. Visually examine the latch striker for bending or misalignment. If it’s bent, the door won’t close properly. Minor bends can sometimes be straightened with gentle pressure from a rubber mallet, but severe damage requires a new latch assembly.
Verify Control Settings and Cycle Selection
Before suspecting a control board failure, confirm that you’ve actually started a wash cycle. Open the door, select a wash cycle (Wash or Normal is typical), close the door, and press the Start/Resume button. Wait five seconds. The control panel should illuminate or beep to confirm the cycle has begun.
Check for secondary settings that might prevent a cycle from starting: child lock (often indicated by a lock icon), delay start (showing a timer), or a pause state. Consult your dishwasher’s user manual for the exact button combinations to disable these features, they vary by manufacturer. If the control panel appears unresponsive (no lights, no beeps), try a hard reset: switch off the circuit breaker for two to five minutes, then switch it back on. This clears temporary electronic glitches.
If none of these steps restore the cycle, or if the dishwasher fills partway and then stops, a failed thermal fuse or defective electronic control board is likely. These components require professional diagnosis and replacement.
When to Call a Professional Repair Service
After working through these checks, you’ll know whether the repair is a simple fix or a job for a trained technician. Call a professional if:
• The water shutoff valve is fully open and the supply line is straight and undamaged, but the dishwasher still won’t fill.
• You hear humming or buzzing sounds at the start of the cycle with zero water entering the tub.
• You see leaks, water pooling under the unit, a burning smell, or signs of electrical damage around the inlet valve or control panel.
• The door latch appears damaged or misaligned beyond simple cleaning.
• You suspect a failed inlet valve, float switch, control board, or wiring issue.
Professional technicians have multimeters, replacement parts in stock, and experience with your specific dishwasher model. They can diagnose electrical faults that DIY testing can’t reliably uncover. Service calls typically cost $100–$200 in labor: parts and total repair costs depend on what needs replacing. For units under warranty, contact the manufacturer or an authorized service center.
If your dishwasher is older (10+ years) and repair costs exceed 50% of a replacement unit’s price, replacement often makes financial sense. Modern dishwashers use less water and energy, which offsets the upfront cost over time. For newer, expensive models, repair is usually the better choice. As you troubleshoot, resources like Good Housekeeping’s appliance reviews can help you evaluate replacement options if the unit is beyond saving.
While you’re investigating water-fill issues, remember that insufficient water is different from poor cleaning performance. If water is reaching the tub but dishes still come out dirty, the problem may lie elsewhere, clogged spray arms, worn wash jets, or detergent buildup. Articles on common dishwasher cleaning problems and top rack cleaning solutions address those scenarios. For routine maintenance, cleaning your dishwasher with vinegar removes mineral deposits that can accumulate over weeks and interfere with valve operation. Regular maintenance prevents many water-fill issues before they start.